Project Process
Step 1: Picking the Song
This project was one that I was already thinking about doing for quite a while, so I already had a good idea of what song I wanted to select. I decided on picking Love Me Not by Ravyn Lenae.
This song is one that I’ve always been quite fond of, and I thought that it’d be a perfect one to make an animatic for. I also wanted to make sure that it’d be a song I wouldn’t get tired of hearing for a good couple of weeks nonstop while I worked through this project.
Step 2: Making a Concept and Story
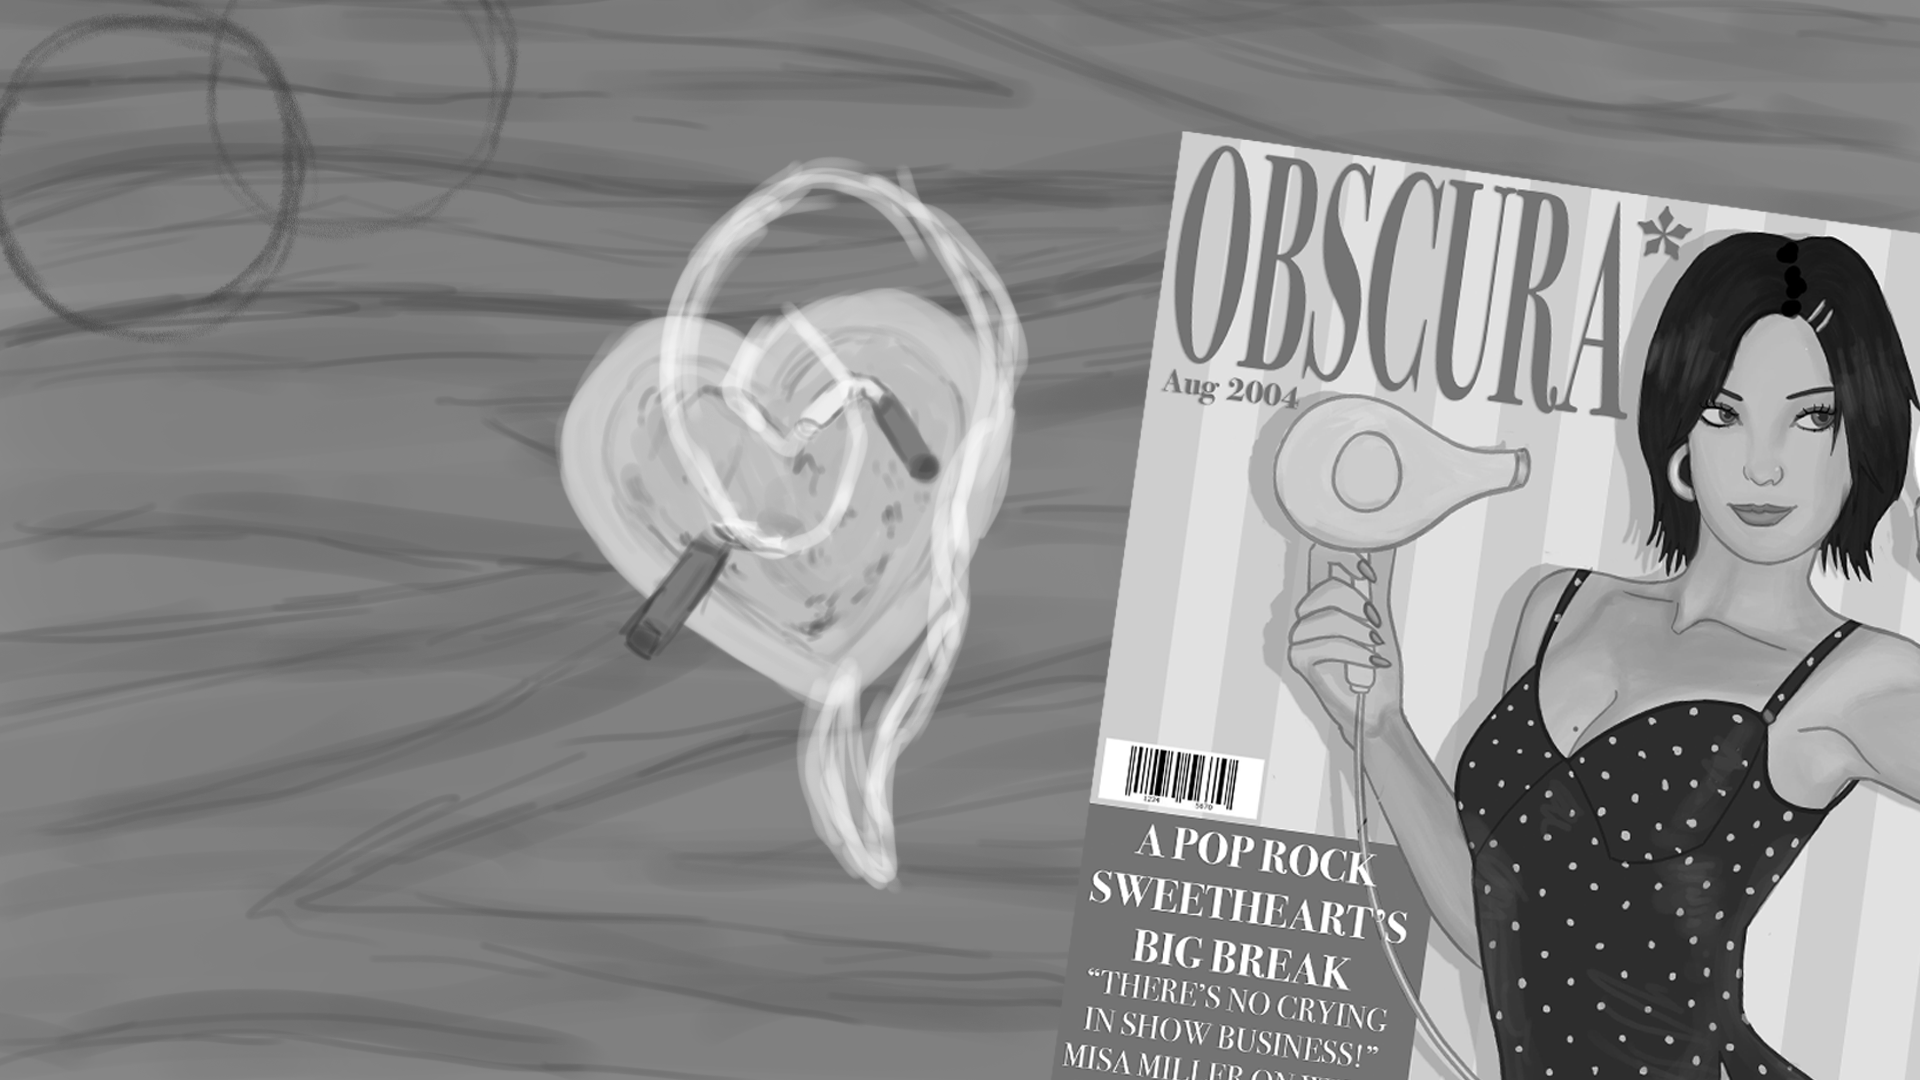
I’d always been wanting to explore original character work, and my character Misa Miller fit perfectly with this song’s theme of an unhealthy, on-and-off relationship and the struggle between need and independence.
Taking place in 2004, Misa Miller, a rising pop rock artist, finds herself trapped in a toxic cycle with an unfaithful fellow musician. Despite knowing the relationship is wrong, she stays, because she is torn between respect for herself, love, ambition, and the lingering fear of missing her shot at fame.
Throughout this project, I chose not to directly show or even name the guy that Misa struggles with. I felt that his identity wasn’t important, because this project is meant to only show how the relationship affects Misa. This story is meant to be a glimpse into Misa’s emotions alone, highlighting her anger, frustration, and mistreatment without offering any potential sympathy for her unfaithful partner.
Step 4: Chopping up the Audio
Since I would only be getting a final duration of one minute, I had to decide on what lyrics I wanted to use. For this, I had to do a bit of cutting and mixing. In the end, I decided to keep the beginning instrumental to establish intro shots, then cut straight to the last couple verses of the song since they both hold the most audible emotion.
You gotta say that you’re sorry at the end of the night
Wake up in the morning, everything’s alright
At the end of the story, you’re holding me tight
I don’t need to worry, am I out of my mind?
And, oh, it’s hard to see you, but I wish you were right here (I’m losing my mind)
Oh, it’s hard to leave you when I get you everywhere
All this time I’m thinking I’m strong enough to sink it
Oh, no, I don’t need you, but I miss you, come here
I also wanted to hold the final instrumental as well so that I could have some closing establishment shots as well.
Step 5: Storyboarding
For the next part of this project, I wanted to storyboard how I sort of wanted this story to go. Since I would only be getting 60 seconds to make this story clear, I had to make sure that I’d be able to do so before creating the actual final scenes. Beneath the sketches, I also wrote a little description of what was going on, as well as the lyric line that would go along with the panel.


This storyboard does reflect the separate ending that I had originally intended, but I ended up going a separate route by stretching the talk show interview portion through to the end of the video rather than having shots of Misa in her apartment.
Step 6: Creating the Shots
I created all the artwork in Photoshop on my iPad, with files syncing automatically to my computer. This made it easier for me to focus on most of the drawing at home and the editing work in After Effects during class.
I originally planned to mix simple sketched shots with fully rendered ones, so I kept everything in black and white to smooth the potential transition between styles. In the end however, even though I still decided to render every shot for a more cohesive look, the black and white approach still proved to be a timesaver, since rendering in color usually takes me much longer.
Step 7: Putting it all Together
Once I had everything done, I was able to edit it all together and complete the project. Once it was rendered, it was ready for sharing.